HOW TO USE A PAINT SPRAYER FOR SHUTTERS
Project overview
With a fresh coat of stain or paint, decorative shutters greatly improve your home's curb appeal while preserving and protecting them from sun and weather damage. Magnum by Graco’s paint sprayers for shutters and easy-to-follow guide make it simple to learn how to paint shutters for your home.
Safety notice: Whenever operating spray equipment, take proper safety precautions, stay alert, and be mindful of potential hazards. Wear protective gear such as gloves, safety glasses/goggles, spray sock (hood), hat, proper footwear, dust masks and respirators. Make sure there is adequate ventilation. If you’re painting in the vicinity of appliances, turn them off. (See Safety Precautions in your Sprayer Operation Manual.) Always refer to the specific instructions and safety procedures for the spray equipment you are using.

WATCH: How to spray small projects (3:12)
Suggested tools & equipment
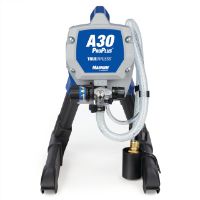
- Magnum by Graco paint sprayer (visit Paint Sprayer category page to compare models)
- Paint/Stain
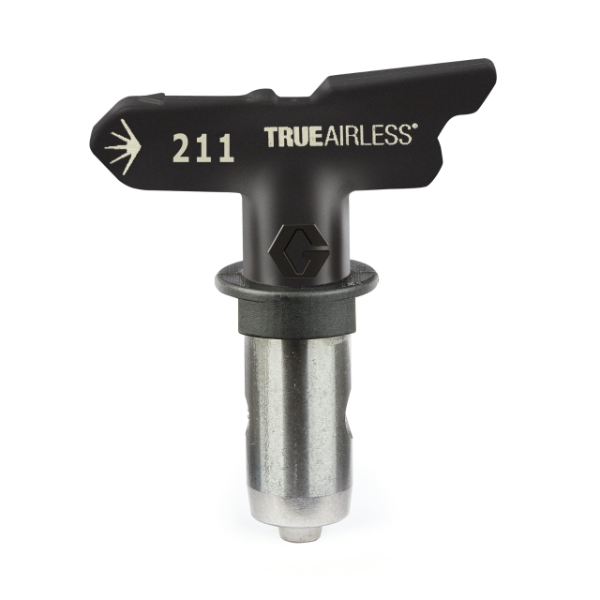
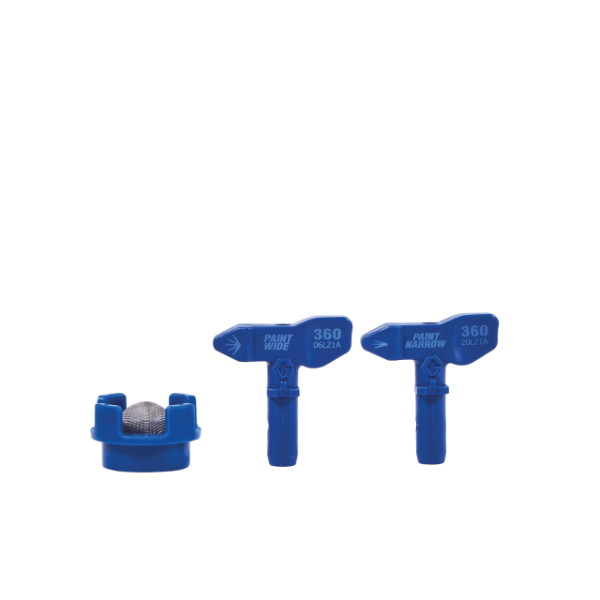
- Spray tips – a wider spray pattern for large surfaces and narrow size for smaller surfaces
- Empty buckets for priming sprayer and cleanup (two needed)
- Stir sticks
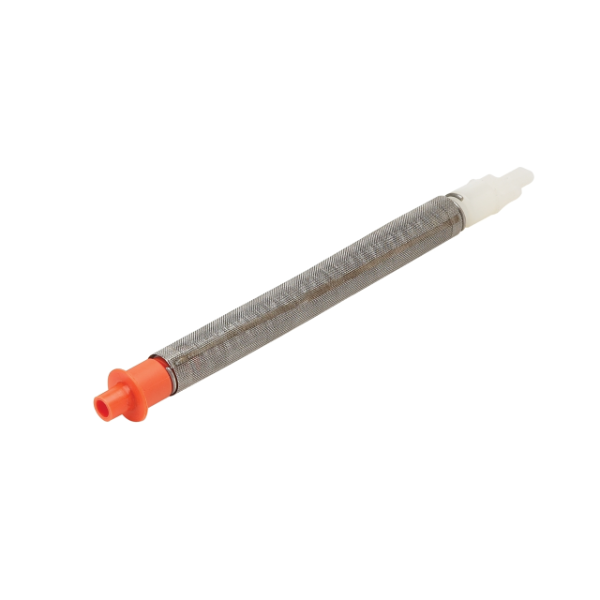
- Paint strainer bag, if available – helps prevent tip plugs and provides a better finish
- Tarps, drop cloths, or plastic sheeting
- Masking tape
- Paint brush for touch-ups
- Magnum tip extension (optional) – for hard-to-reach areas that would otherwise require a ladder
- Pump Armor storage fluid (see pump protectant product details)
- Pair of sawhorses
- Scrubbing sponge and extra cleaning rags
- Stiff nylon brushes for cleanup
- Safety and protection equipment – safety glasses/goggles, dust mask/respirator, spray sock or hat to cover head
Getting started/prep
- Before you spray paint shutters, remove the shutters from the house. Some types are attached with special plastic push-to-hold fasteners that cannot easily be pulled out without damaging them. For those types of shutters, be prepared to buy replacement fasteners from your local home improvement centre. Be particularly careful (especially when working on a ladder), as wasps and spiders like to make their homes behind shutters).
- Choose an open area away from other structures as your workplace. Protect the grass or pavement in that area with drop cloths, and because overspray can travel in the wind, cover any nearby shrubs with plastic.
- Lay the shutters across a pair of sawhorses set atop the drop cloths; then use a scrubbing sponge and a cleaning agent (or a pressure washer outfitted with its low-power washing nozzle) to wash off any loose paint, dirt or animal/insect debris. Rinse thoroughly and allow the surface to dry.
Spraying
- Select the spray tip that's best suited for the paint or stain you are using and the surface to be sprayed. For thinner materials such as stains, a tip with a narrower 8-inch-wide (20cm) spray pattern and a 0.13 hole size will give you the best control. Be sure the tip's hole size does not exceed the maximum capacity of your sprayer (see manual).
- If you're using paint from multiple containers, mix it together in an empty 10-litre container to ensure consistent colour even if small colour differences exist between individual paint cans. When spraying lighter materials like stains, select the lowest pressure setting that enables you to maintain a good spray pattern. Lower pressure settings will give you better control and a finer finish.
- Start by spraying the outer faces of the shutter's edges; then spray the rest of the shutter. Work from the top-down, keeping the spray tip approximately 12 inches (30 cm) from the shutter's surface. Spray individual repeated passes until you've covered the entire shutter, overlapping each pass by 50%. In the case of louvred shutters, make sure to spray into each louvre space, and don't forget to spray any exposed hardware that needs to match the colour of the shutter.
Clean-up
- Allow significant time for the paint or stain to dry; then remove all coverings from shrubs, bushes, plants, and surfaces.
- Remount the shutters on the exterior walls.
- Clean your airless sprayer after each use. Follow the directions in your user's manual for Power Flush cleaning with water-based materials or use the bucket method of cleaning if applicable. For more information, refer to your Sprayer Operation Manual.
Looking for more videos to watch?
Check out our Education Centre with videos that cover product preparation, start-up and clean-up tips, spraying advice, troubleshooting and much more.
Recommended products for shutters

Related Projects
Doors & Trim
Discover how to use paint sprayers for doors and stain trim using tools from Magnum by Graco. Sprayers let you eliminate brush marks and get an even coat.
Sheds
Learn how to spray paint sheds with sprayers by Magnum by Graco. Applying a new coat of paint or stain is easy with Magnum by Graco sprayers.
Garage doors
Learn how to spray paint garage doors with high quality paint sprayers by Magnum by Graco with this guide. Spraying is quicker to get a smooth finish.
Recommended accessories


Related projects
Doors & Trim
Discover how to use paint sprayers for doors and stain trim using tools from Magnum by Graco. Sprayers let you eliminate brush marks and get an even coat.
Sheds
Learn how to spray paint sheds with sprayers by Magnum by Graco. Applying a new coat of paint or stain is easy with Magnum by Graco sprayers.
Garage doors
Learn how to spray paint garage doors with high quality paint sprayers by Magnum by Graco with this guide. Spraying is quicker to get a smooth finish.
Do you have any product questions?
Register your unit
Register your product and receive a free bottle of Pump Armor, a storage fluid that extends the life of your pump.