How To Paint a Popcorn Ceiling Using an Airless Sprayer
Project Overview
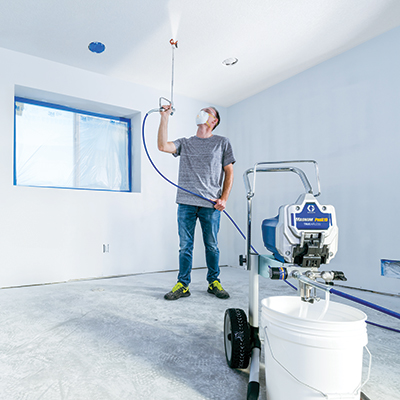
Painting a textured ceiling with paint rollers takes time and can cause the texture to flake off from the surface. Using an airless paint sprayer to paint a textured ceiling saves you time and preserves the appearance while providing a more complete and uniform coverage.
Safety Notice: Whenever operating spray equipment, take proper safety precautions, stay alert, and be mindful of potential hazards. Wear protective gear such as gloves, safety glasses/goggles, spray sock (hood), hat, proper footwear, dust masks and respirators. Make sure there is adequate ventilation. If you’re painting in the vicinity of appliances, turn them off. (See Safety Precautions in your Sprayer Operation Manual.) Always refer to the specific instructions and safety procedures for the spray equipment you are using.
WATCH: How to Spray a Vaulted Ceiling (2:48)
Suggested Tools & Equipment
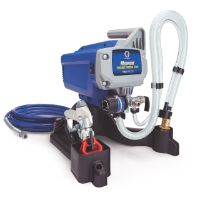
- Graco, Magnum, or TrueCoat Paint Sprayer (visit Paint Sprayer category page to compare models)
- Paint
- Spray tips – a wider spray pattern for large surfaces and narrow size for smaller surfaces (see tip selector)
- Empty buckets for priming sprayer and cleanup (two needed)
- Stir sticks
- Paint strainer bag – helps prevent tip plugs and provides a better finish
- Tarps, drop cloths, or plastic sheeting
- Masking tape
- Paint brush for touch-ups
- Magnum tip extension – for hard-to-reach areas that would otherwise require a ladder
- Pressure roller kit (optional)
- Additional airless hose sections if needed
- Spray shield
- Pump Armor storage fluid or TSL fluid (see pump protectant product details)
- Cleaning rags
- Stiff nylon brushes for cleanup
- Safety and protection equipment – safety glasses/goggles, dust mask/respirator, spray sock or hat to cover head
Prepping A Room For Spraying
- Move as much of the furniture out of the room as possible. Any furniture left in the room should be moved to the center and completely covered. Make sure to have plenty of space for your tools and equipment.
- Cover everything you don’t wish to get paint on. Use masking tape to protect any trim, and cover any walls you don’t want painted with plastic tarps or protective paper. Remove or cover light fixtures.
- Cover everything you don’t wish to get paint on. Use masking tape to protect any trim, and cover any walls you don’t want painted with plastic tarps or protective paper. Remove or cover light fixtures.
Spray Painting A Ceiling
- Select the spray tip that’s best suited for the paint you are using and the surface to be sprayed. Be sure the tip’s hole size does not exceed the maximum capacity of your sprayer (see spray tip info).
- If you’re using paint from multiple containers, mix it together in an empty 5-gallon container to ensure consistent color even if small color differences exist between individual paint cans. If you are spraying the ceiling only, use paper, plastic tarps, or a spray shield to protect the walls. If you choose to use a spray shield, position it tightly at a 45-degree angle into the corner where the wall meets the ceiling surface.
- Begin at an edge where the ceiling and wall meet. Spray along that edge from one side of the room to the other. When your first pass is complete, continue to spray repeated passes until the ceiling is covered, overlapping each pass by 50%.
Clean-Up
- Allow significant time for the paint to dry before removing tape from your trim. This will result in crisp, clean lines.
- Remove all coverings from furniture and other areas.
- Replace any lighting fixtures that you removed and move furniture or other items back into place.
- Clean your airless paint sprayer after each use. Follow the directions in your user’s manual for Power Flush cleaning with water based materials or use the bucket method of cleaning if applicable. For more information, see Power Flush Video or refer to your Sprayer Operation Manual.
Related Products


Related Projects
Shutters
With a fresh coat of stain or paint, decorative shutters greatly improve your home's curb appeal while preserving and protecting them from sun and weather damage.
Sheds
Sheds are great for storage. Just like your house, your shed can fade over time. Graco sprayers make it easy to freshen its appearance with a new coat of paint or stain.
Railings
Railings take a lot of abuse. Keep them looking their best with a fresh coat of paint or stain to preserve and protect them from the sun and weather.