Detecting & Identifying Defects in Steel During Surface Preparation
Coatings shrink as they cure, resulting in low film thickness over sharp edges and welds, which is a classic reason why coatings fail.
Repairing defects is normally not part of an abrasive blaster’s job description, but when you are charged with prepping the surface it’s imperative the coating adheres properly, and surface defects can prevent that from happening. The abrasive blaster is the only person on the job who looks at the entirety of the steel surface, which makes you the last line of defence for finding defects.
Finding and reporting defects is not only essential but welcome. Providing this additional service is an effective way to make an impression and distinguish yourself from the competition. Before you can accurately and effectively identify defects, you need to know what to look for.
Three kinds of steel surface defects
ISO 8501-3, ‘Preparation of steel substrates before application of paints and related products’, sorts defects into three categories:
• Welds
• Edges
• Steel surfaces in general
When inspecting for defects, pay close attention to welded joints, cuts, punctures and scoring. Run a gloved hand over the distressed areas looking for places where it catches to identify protrusions. Some protrusions, such as weld spatter, can be abrasively blasted, others will require grinding.
When asked to grind a protrusion with power tools, it is crucial to avoid leaving any surfaces rough, with burrs or burnished. When grinding defects, it is also important to not reduce the mass of the substrate to less than that of the surrounding metal, also to not to grind in a way that creates excessive heat – both cases will weaken the steel. Also, ground defects should be inspected afterwards by the glove test to ensure that the process did not create sharp edges.
Knowing what kinds of defects to look for, let’s look at the different grades of surface prep.
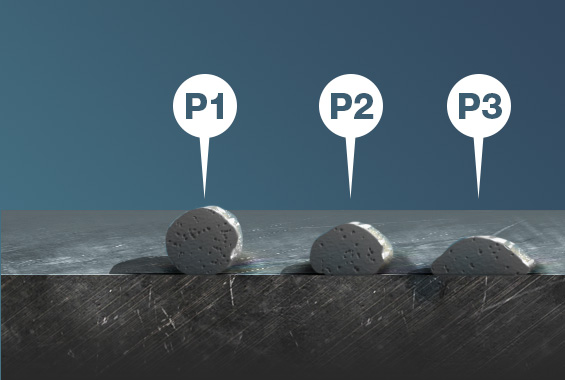
Making the Grade
There are three grades for steel surfaces dealing with visible imperfections as set out by ISO 8501-3:
P1 Light Preparation: no preparation or only minimum preparation needs to be carried out before application of paint;
P2 Thorough Preparation: most visible imperfections are remedied;
P3 Extensive Preparation: the surface is free from significant visible imperfections.
When deciding on the preparation grade, make sure you’re preparing the surface to specifications, especially considering that a single fabrication may require different prep grades — for instance: P1 on the inward-face and P3 for the outside wall.
Getting a consensus between all relevant parties on preparation grades and specific visible imperfections before you start can save time and effort.
Imperfections, Defects and Prep Grades Revealed
Weld Spatter
During the transfer of wire to weld, there is a disturbance in the molten weld pool. This disturbance, usually caused by the voltage being too low or amperage being too high, causes weld matter to fulminate onto the steel surface.
Preparation Grades
P1 – Free from all loose weld spatter (a)
P2 – Free from all loose and lightly adhering weld spatter (a + b)
P3 – Surface must be free from all weld spatter. (a + b + c)
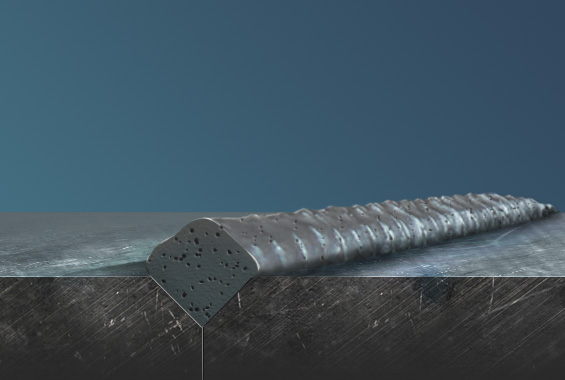
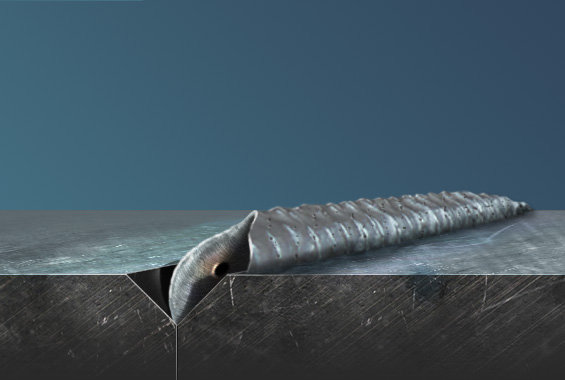
Weld Ripple/Profile
Surface oscillations in the weld pool solidifies as a ripple along the length of the bead profile.
Preparation Grades
P1 – No Preparation
P2 – Surface shall be dressed to remove irregular and sharp-edged profiles
P3 – Surface shall be fully dressed, i.e. smooth
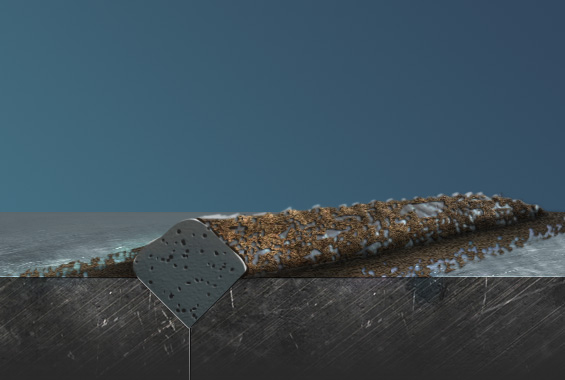
Weld Slag
The deoxidisation process between the flux coating, air and surface; the result of which is deposited as a residue on and around the weld bead.
Preparation Grades
P1 – Surface shall be free from welding slag
P2 – Surface shall be free from welding slag
P3 – Surface shall be free from welding slag

Undercut
A weld flaw; a groove or crater near the toe of the weld bead resulting in a weak bond and is prone to cracking.
Preparation Grades
P1 – No preparation
P2 – Surface shall be free from sharp or deep undercuts
P3 – Surface shall be free from sharp or deep undercuts
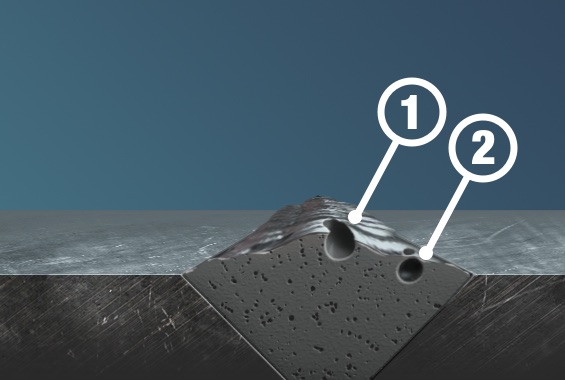
Weld Porosity
Weld porosity is a common welding defect. When you apply a torch to treated metal, gasses are released and absorbed into the molten metal. As the metal cools, the gasses are released from the metal, forming pores.
Preparation Grades
1 – Visible
2 – Invisible (might open after abrasive blast cleaning)
P1 – No Preparation
P2 – Surface pores shall be sufficiently open to allow penetration of paint
P3 – Surface shall be free from visible pores
Weld End Crater
Incorrect weld technique; this defect occurs where the arc has been broken, resulting in a crater.
Preparation Grades
P1 – No preparation
P2 – End craters shall be free from sharp edges
P3 – Surface shall be free from visible end craters

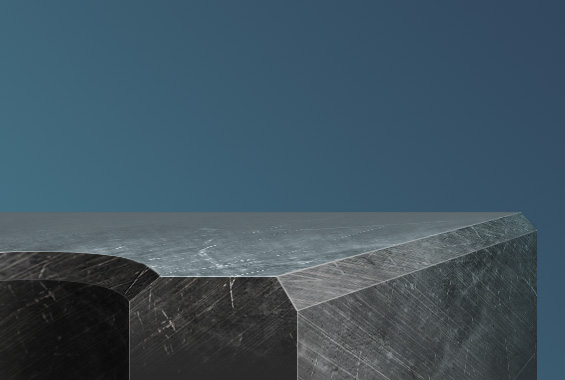
Rolled edges
When an edge has formed to transition from one surface plane to another surface plane in a gradual curvilinear fashion.
Preparation Grades
P1 – No Preparation
P2 – No Preparation
P3 – Edges shall be rounded with a radius of not less than 2 mm
Edges: punch, Shear, Saw, Drill
Edge transitions made during fabrication by punching, shearing, sawing or drilling tools.
Preparation grades
P1 – No part of the edge shall be sharp; the edge shall be free from fins
P2 – No part of the edge shall be sharp; the edge shall be free from fins
P3 – Edges shall be rounded with a radius of not less than 2 mm
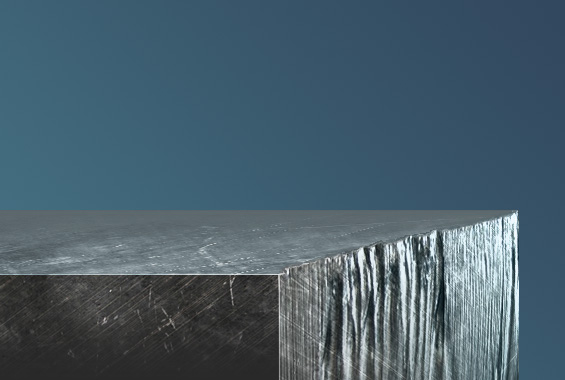
Thermally Cut Edges
When a plasma, oxygen fuel or other thermal process is used to cut steel.
Preparation Grades
P1 – Surface shall be free from slag and loose scale
P2 – No part of the edge shall have an irregular profile
P3 – Cut face shall be removed and edges shall be round

Pits and Craters
When corrosion, of an extremely localised variety, leads to small perforations on the steel substrate.
Preparation grades
P1 – Pits and craters shall be sufficiently open to allow penetration of paint
P2 – Pits and craters shall be sufficiently open to allow penetration of paint
P3 – Surface shall be free from pits and craters

Shelling/slivers/hackles
A layer of corrosion in steel causing the corroded surface to separate and lift, leaving an interlocking flaky shell texture.
Preparation grades
P1 – Surface shall be free from lifted material
P2 – Surface shall be free from visible shelling
P3 – Surface shall be free from visible shelling
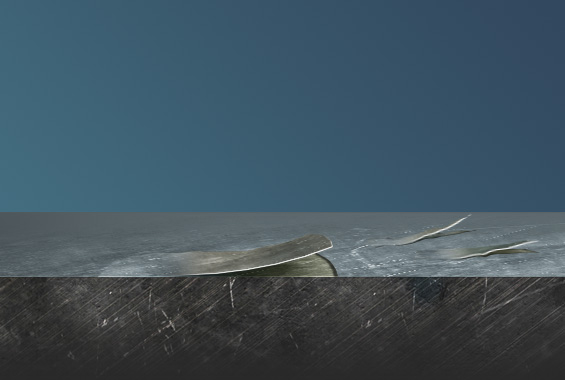
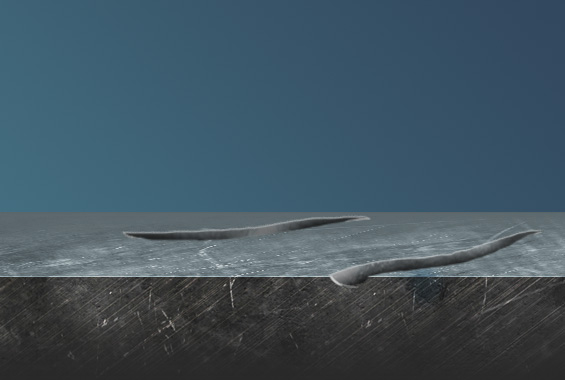
Roll-overs/cut laminations
A fabrication defect cutting into the surface causing a thin protruding slice.
Preparation grades
P1 – Surface shall be free from lifted material
P2 – Surface shall be free from visible roll-overs/cut laminations
P3 – Surface shall be free from visible roll-overs/cut laminations

Rolled-in extraneous matter
A defect occurring during the fabrication process where foreign matter is caught under a mechanical roller and embedded into the steel surface.
Preparation Grades
P1 – Surface shall be free from rolled-in extraneous matter
P2 – Surface shall be free from rolled-in extraneous matter
P3 – Surface shall be free from rolled-in extraneous matter
Grooves And Gouges
A disfigured burrow or rough opening found on a steel surface, typically caused by mishandling.
Preparation Grades
P1 – No preparation
P2 – The radius of grooves and gouges shall be no more than 2 mm
P3 – Surface shall be free from grooves and gouges
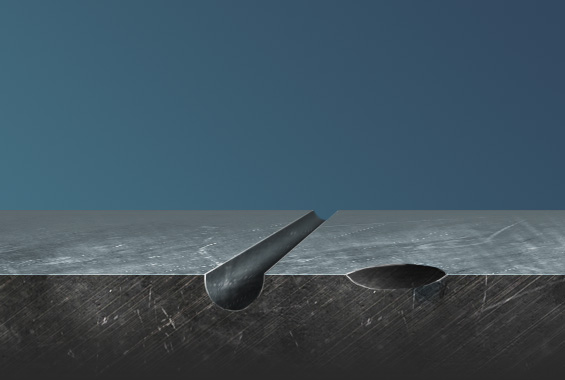
Indentations and Roll Marks
A deep furrow or recess in the steel substrate, typically caused by mechanical manipulation.
Preparation Grades
P1 – No preparation
P2 – Indentations and roll marks shall be smooth
P3 – Surface shall be free from indentations and roll marks
Key Takeaway
Surface defects should be identified during the inspection, with a plan to remove them discussed before the job begins. However, if you encounter surface defects that look problematic during the course of blasting, report the defects to the project manager before taking action.
Related Articles
Silica Dust and Wet Abrasive Blasting
Innovation in abrasive blasting technology being driven by the need to control silica dust
Silica Comparison Wet vs. Dry Blasting
Third-party Industrial Hygiene Survey in order to evaluate potential exposures to respirable airborne dust and respirable silica
PPE & Respirator Requirements For Safe Abrasive Blasting
Everything you need to know about blasting PPE for dry, wet and vapour abrasive blasting.